
How to Make Bleached Shirts
/
I love making bleached shirts! They're fun and a great gift for any occasion! Read on to learn how to make one yourself!
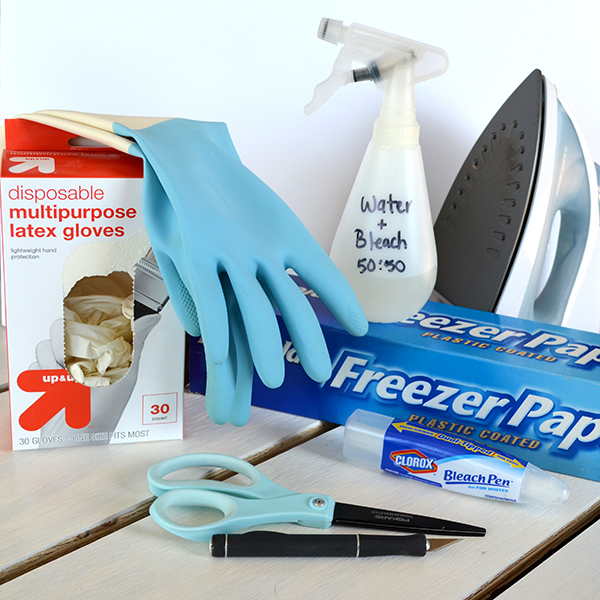
Here’s what you need:
A blank shirt made of at least 60% natural fiber (cotton/rayon)
Protective gloves (rubber, latex, etc.)
50/50 bleach & water mix in spray bottle OR bleach pen
Printer
Freezer paper
Tape
Pen/pencil
Scissors/craft knife
Iron & ironing board
Piece of cardboard or wood to fit inside of your shirt
1. Buy a blank shirt
Cotton and rayon are the best materials to bleach because they are natural. Anything synthetic, like polyester or spandex, won't work. So look for shirts with at least 60% of natural fiber.
Also keep in mind the thickness of the shirt. I’ve personally never had any problems, but bleach can create holes in thin fabric. The shirt should also be able to go into the washing machine (not hand-wash only).
2. Prepare bleach
Put on your protective gloves to prepare the bleach and water mix! Never use full strength bleach. It should be diluted to 50% bleach and 50% water. Grab an empty and clean spray bottle and pour a ratio of 1:1 bleach and water into it. A cup of each is plenty is you have a small bottle. Make sure to label the bottle because you don't want to use it on anything else by accident.
Another option is to buy a bleach pen which you can use directly on a shirt if you want to freehand text or a design.
3. Make a stencil

You will need a printer, freezer paper, a pen, tape, and scissors or craft knife.
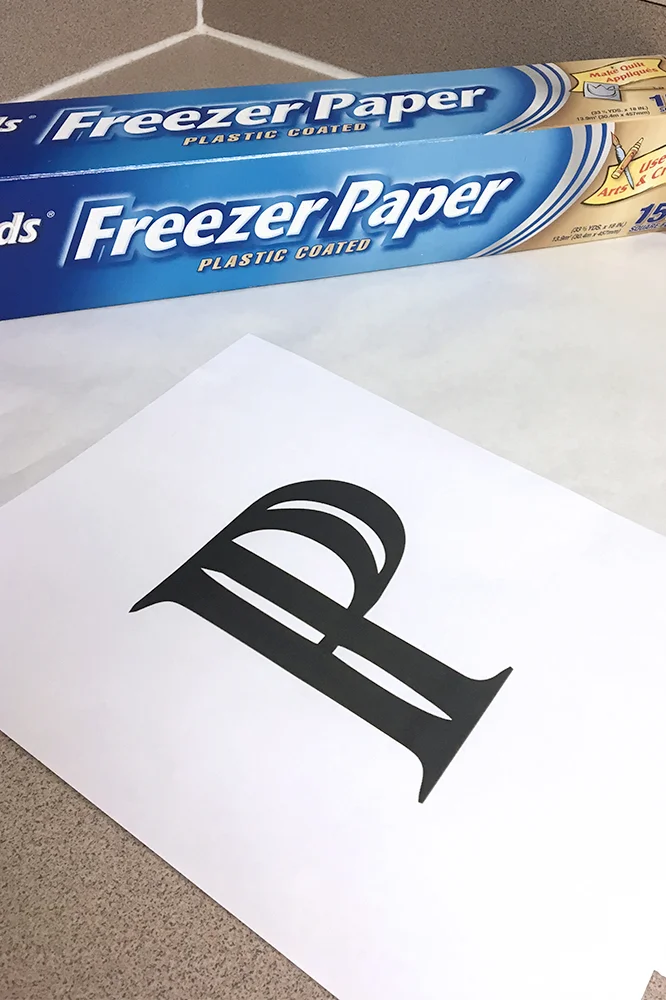
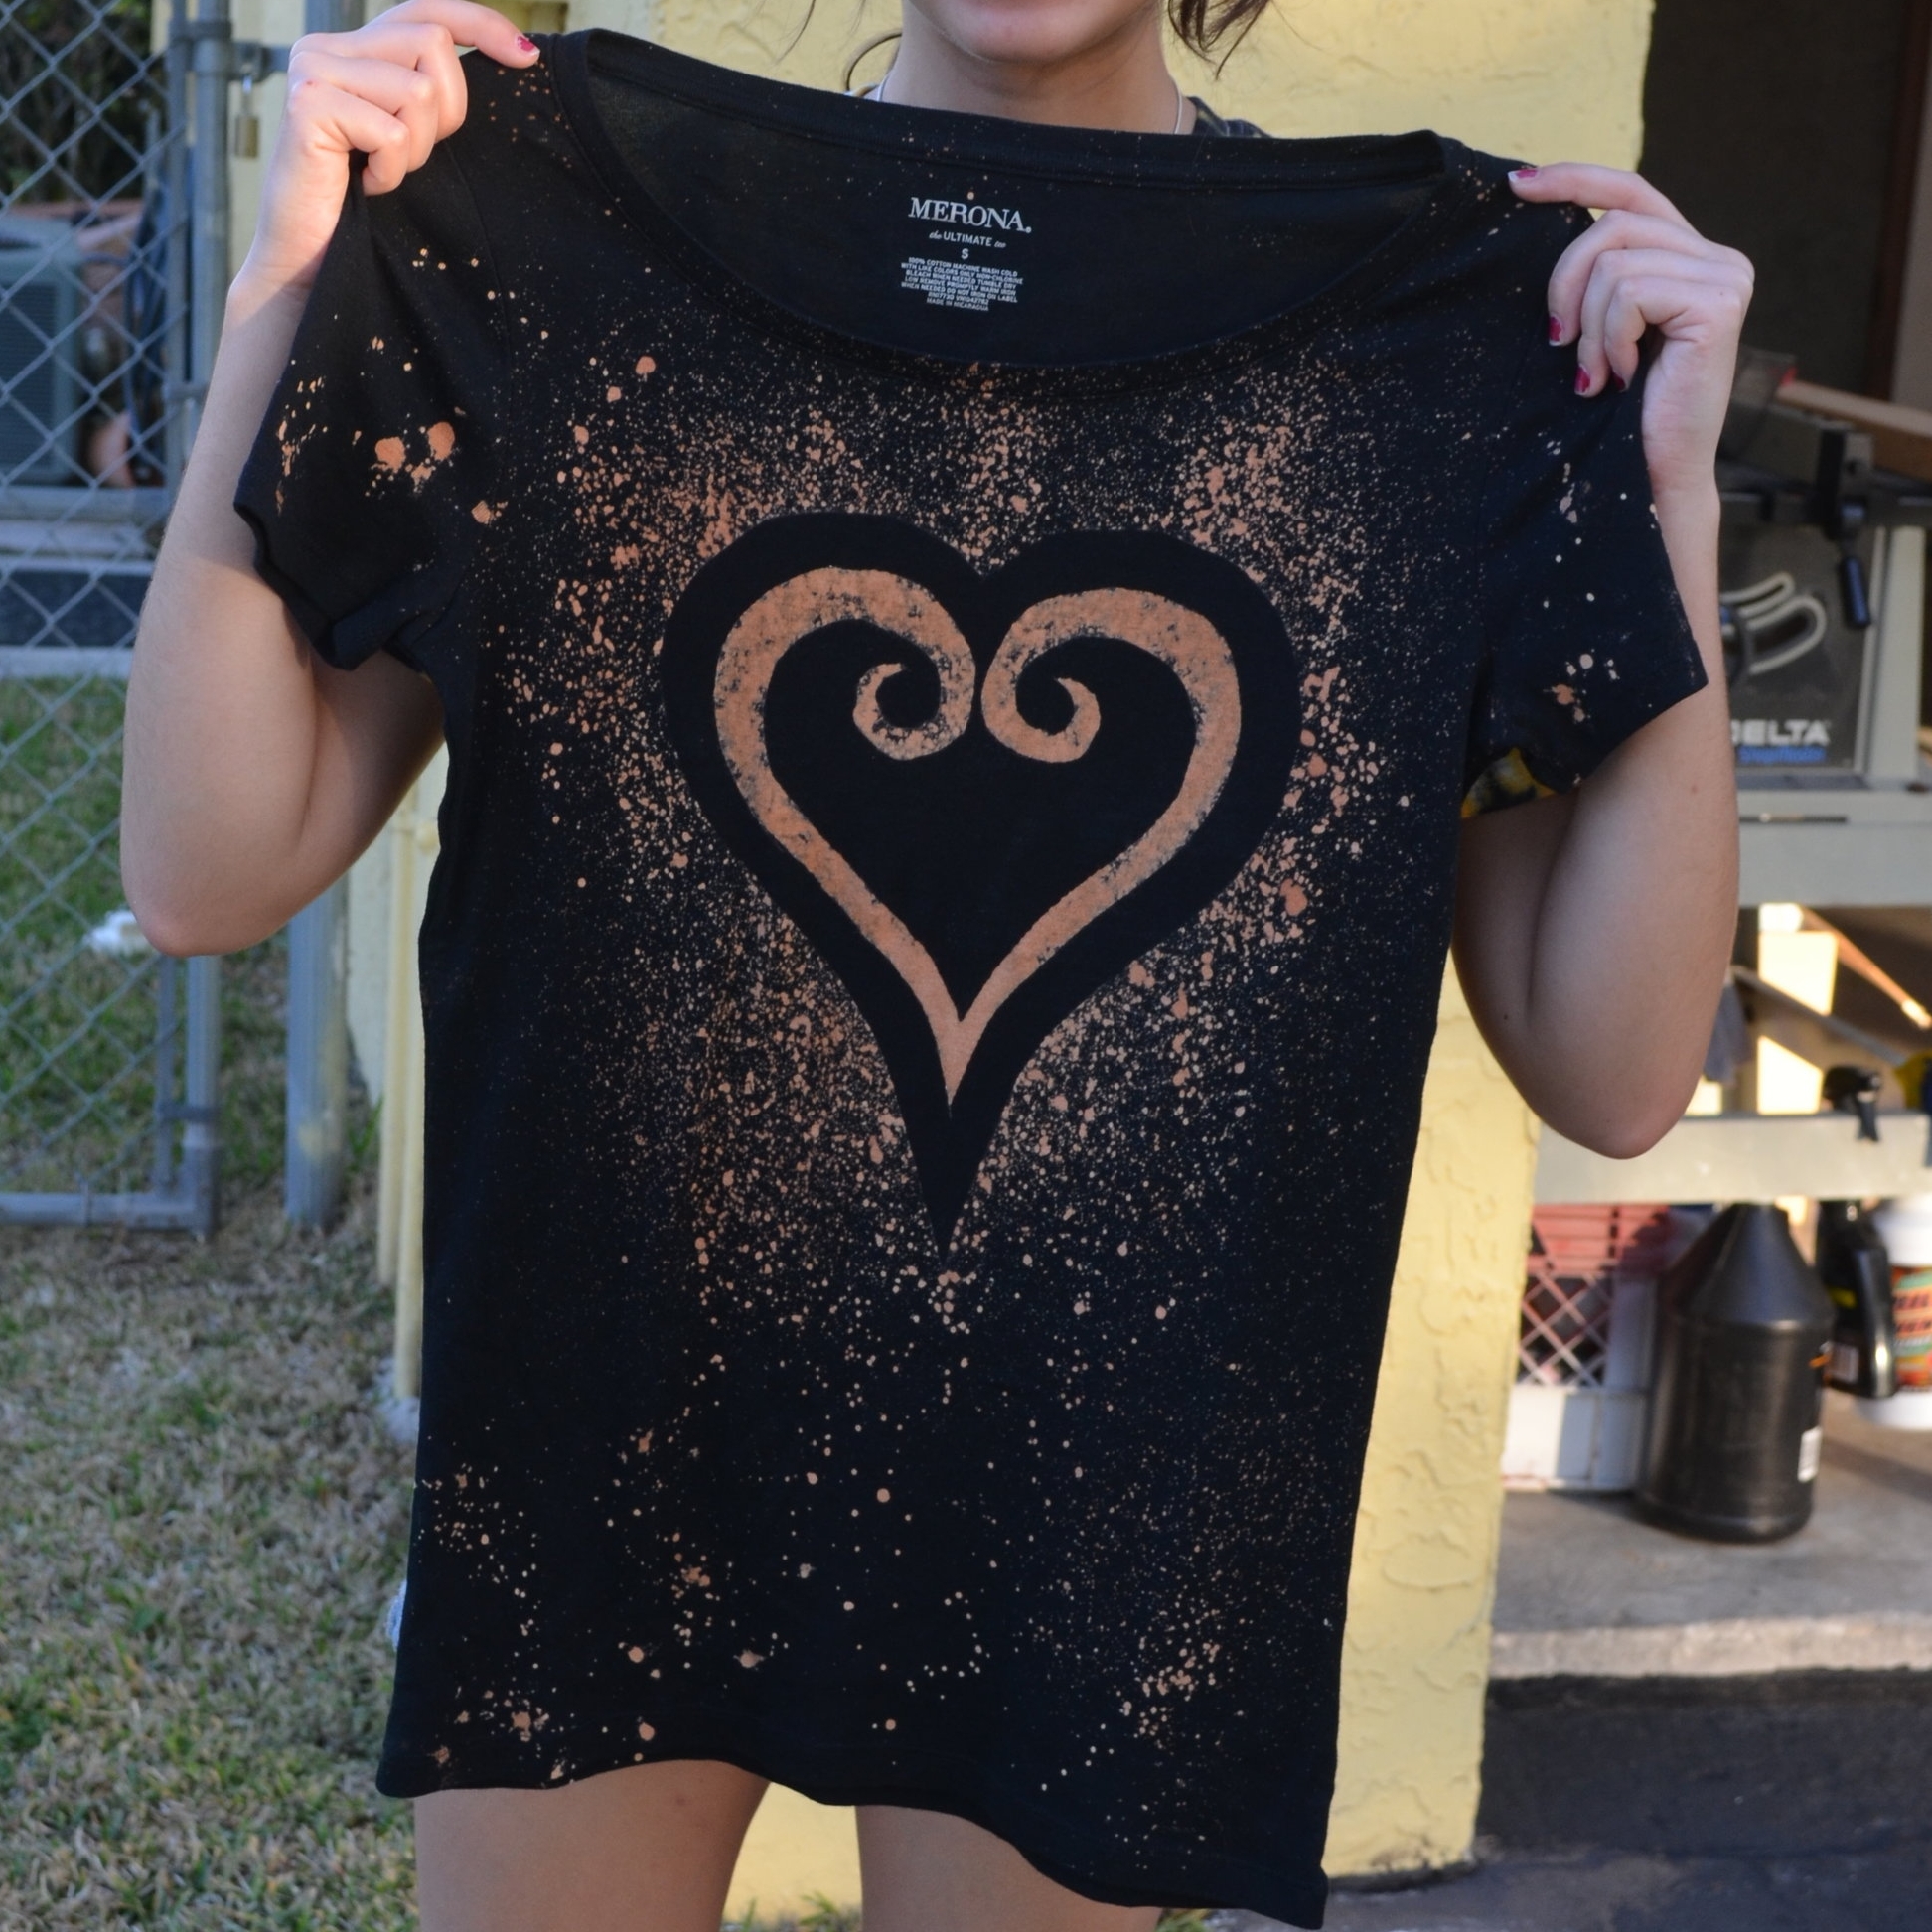
Find an image that you want by either drawing something yourself or finding an image online. You want to pick something simple that will be easy for you to cut out with scissors or a craft knife. You also need to consider which part you will want to bleach and which part you want to leave as the regular shirt color.
Once you figure out what you want on your shirt, print out a picture of it in the size you want. Typical shirt designs are about 8-11 inches tall/wide. Once you print your design, decide on which parts you will bleach. Your stencil will need to be the opposite of the bleached areas so that the shirt will be exposed where you want to bleach it.
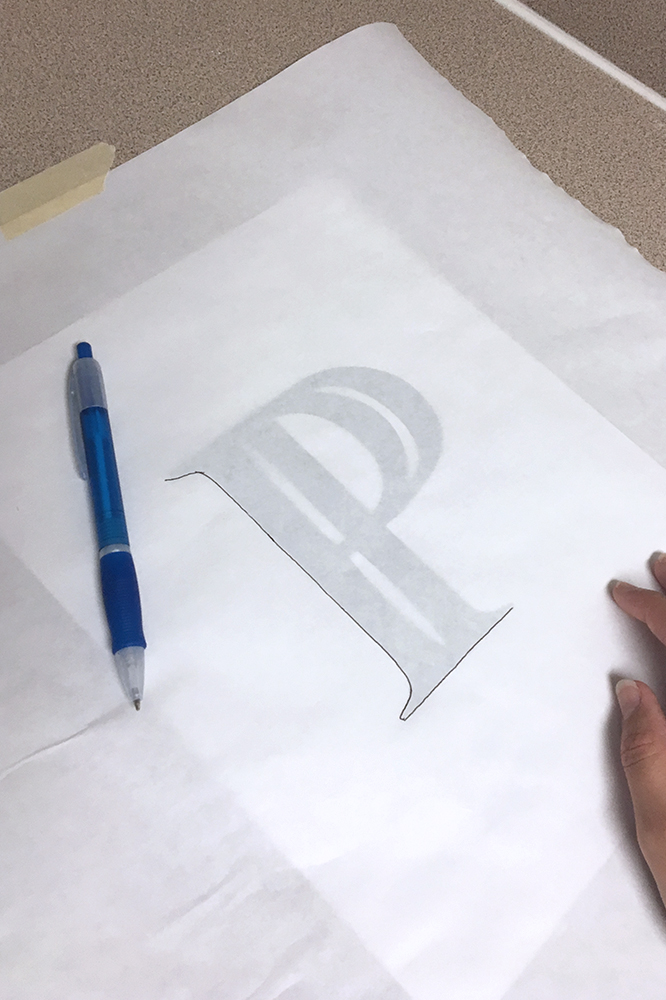
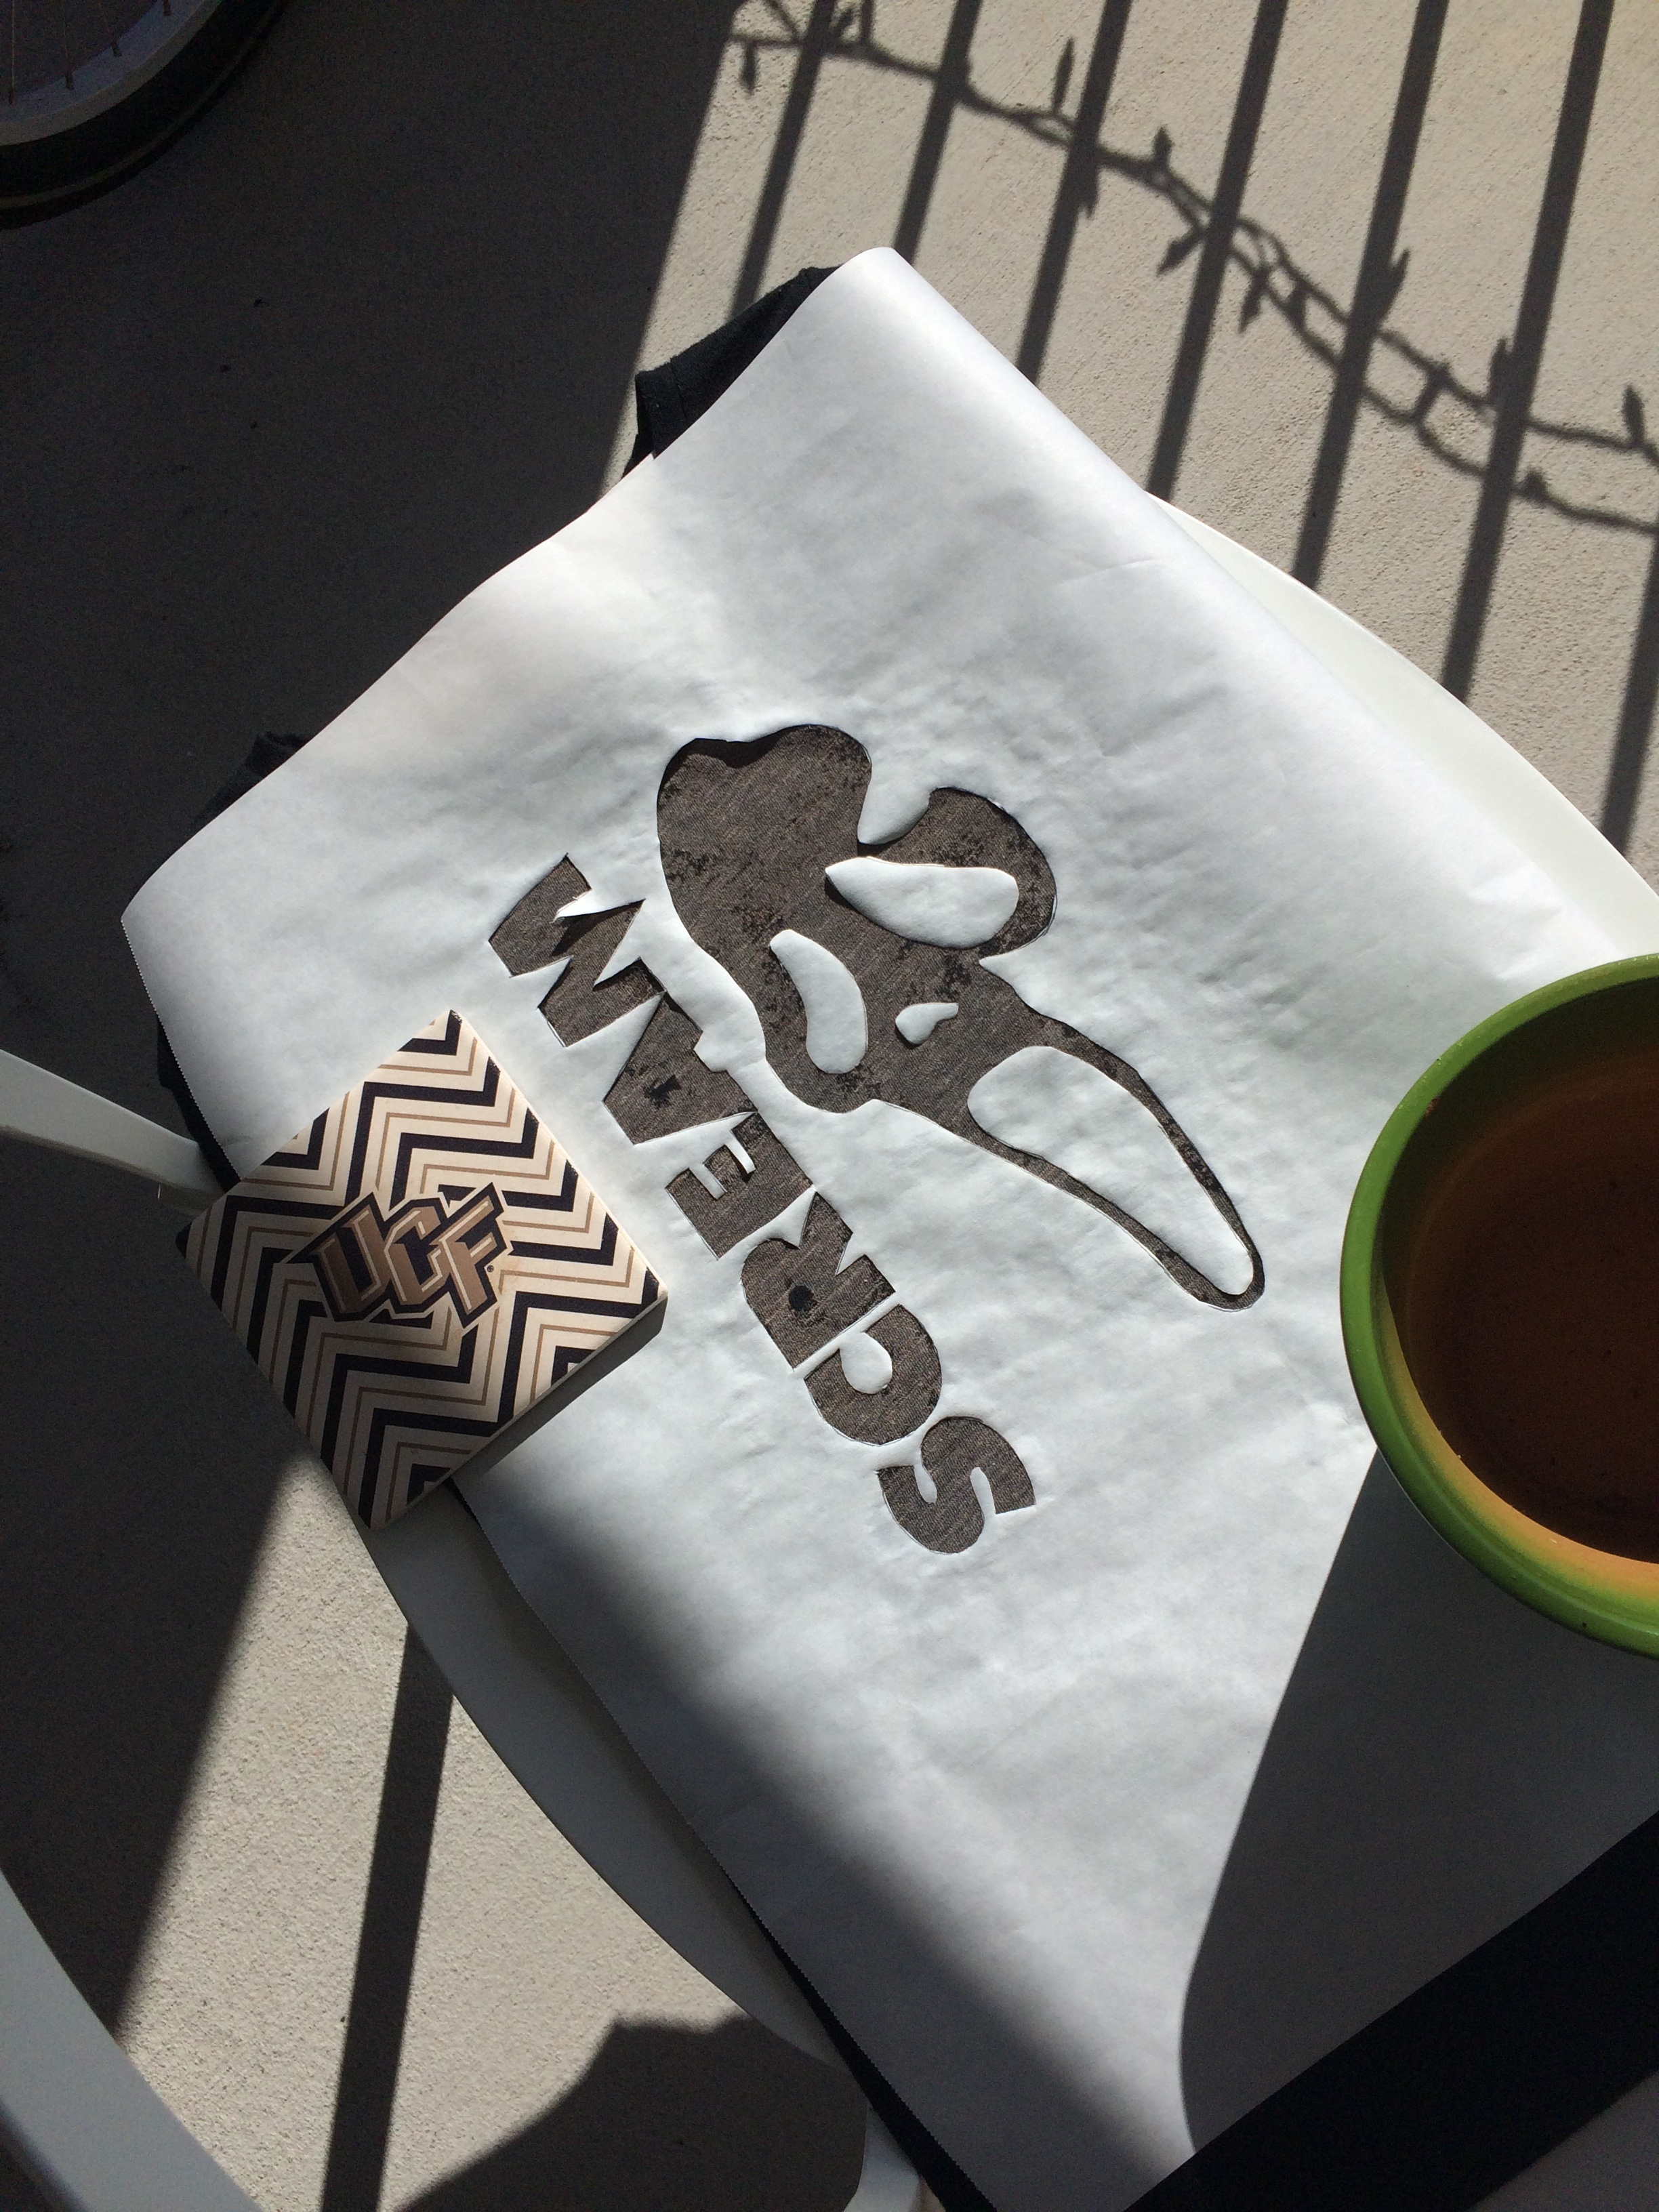
You will then use the printed picture or drawing to trace it onto the freezer paper. Tape your printed design onto the counter or table and lay a piece of freezer paper over it, waxy side down. Tape the freezer paper down as well. The tape will prevent the papers from moving as you trace it. Then trace your design onto the the freezer paper. *Tip: If you have trouble seeing through the freezer paper on the counter try taping both to the window instead.
After your design is traced onto the freezer paper, you will need to cut it out precisely. Use either scissors or a craft knife depending on which is easier. If using a craft knife, make sure you have something underneath the freezer paper, like a piece of cardboard, so that you don't cut into your counter. If you have an loose pieces within the design (like holes in letters for example) make sure you don't lose them.
4. Place an insert inside the shirt
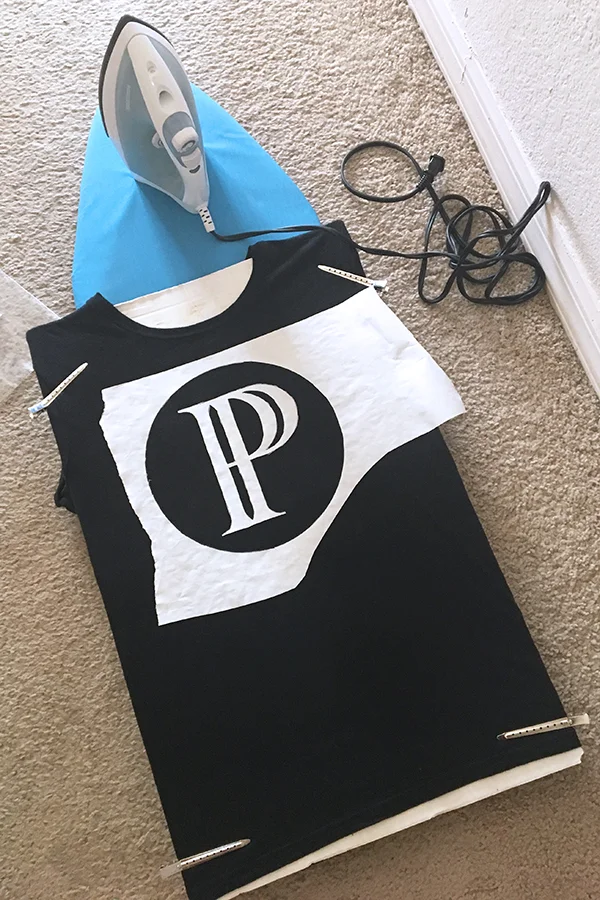
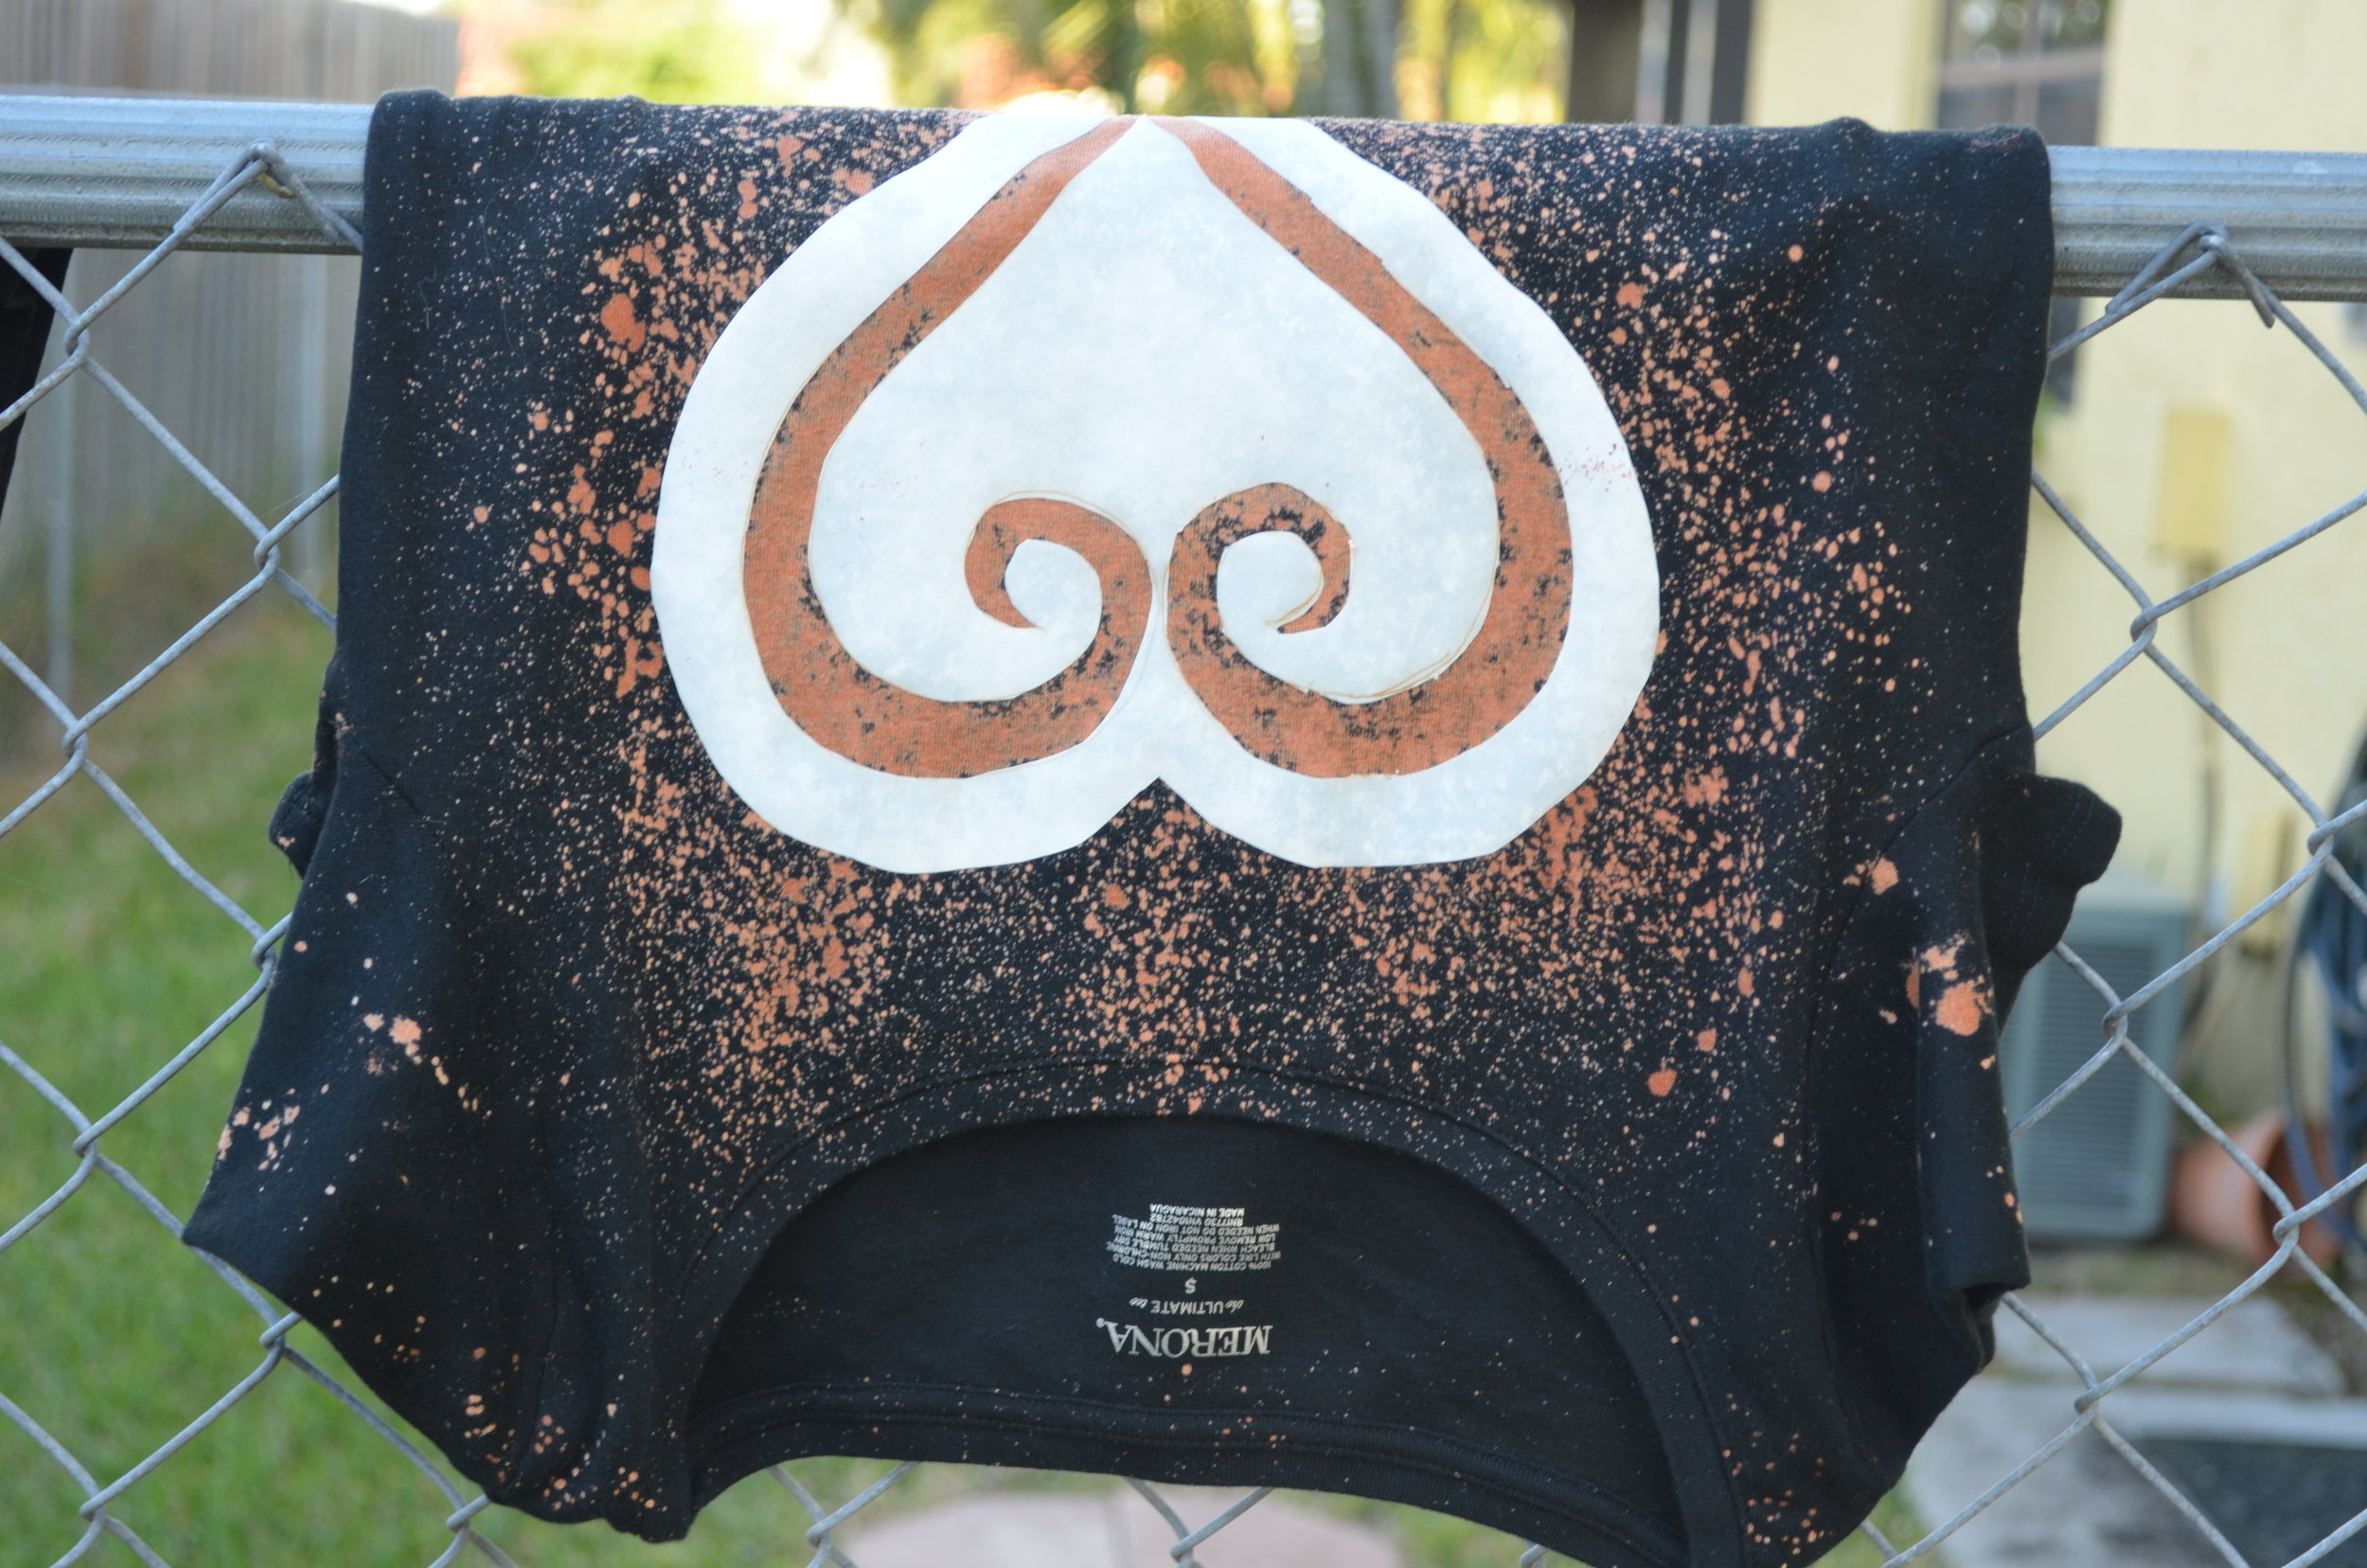
Make sure you insert a thick piece of card board or piece of wood into the middle of your shirt. This insert should cover the entire area that you plan to bleach so that it blocks the bleach from bleeding onto the back of the shirt as well. Unless you want the front and back to be bleached the same; then you could do it without an insert (as long as you place the shirt in a place that you don’t care about getting bleach on when the bleach bleeds through the shirt). You can also use some clips to secure the shirt to the cardboard as you can see in my photo.
5. Iron on the stencil
Once your stencil is cut and you have the insert inside your shirt, you need to iron it onto the blank shirt. Heat your iron to a medium setting and give your blank shirt a quick iron to make it flat. Then lay the freezer paper where you want it, waxy side down, on the shirt and iron the paper until you can tell that it is sticking to the shirt. It should stick enough to the point where it won't fall off with slight movement but you should still be able to peel it off if needed. You should see the freezer paper start to crinkle a bit as the waxy side starts melting onto the shirt.
6. Go outside and put on gloves
I recommend bleaching your shirt outside so that it is well ventilated; I don't like breathing in a bunch of bleach. You can do this on porch, patio, balcony, driveway, wherever, just make sure you're somewhere where a little bleach won't hurt anything if you happen to miss your shirt.
Make sure you also put on some protective gloves so that you don't get any bleach on your skin. That being said also be cautious of what you're wearing. If you splash bleach onto yourself make sure you're not wearing anything you don't want to be bleached and be careful of getting bleach anywhere on exposed skin.
7. Bleach!


Using your prepared spray bottle of 50/50 bleach and water, spray your shirt over the exposed areas of the shirt around the stencil. Try not to spray the stencil directly. I find it best to spray the exposed areas and then use your gloved fingers to spread the bleach around to the edges of the stencil to get a fine line. Otherwise, if you spray the stencil the bleach may bleed through it and bleach the shirt where you don’t want it to.
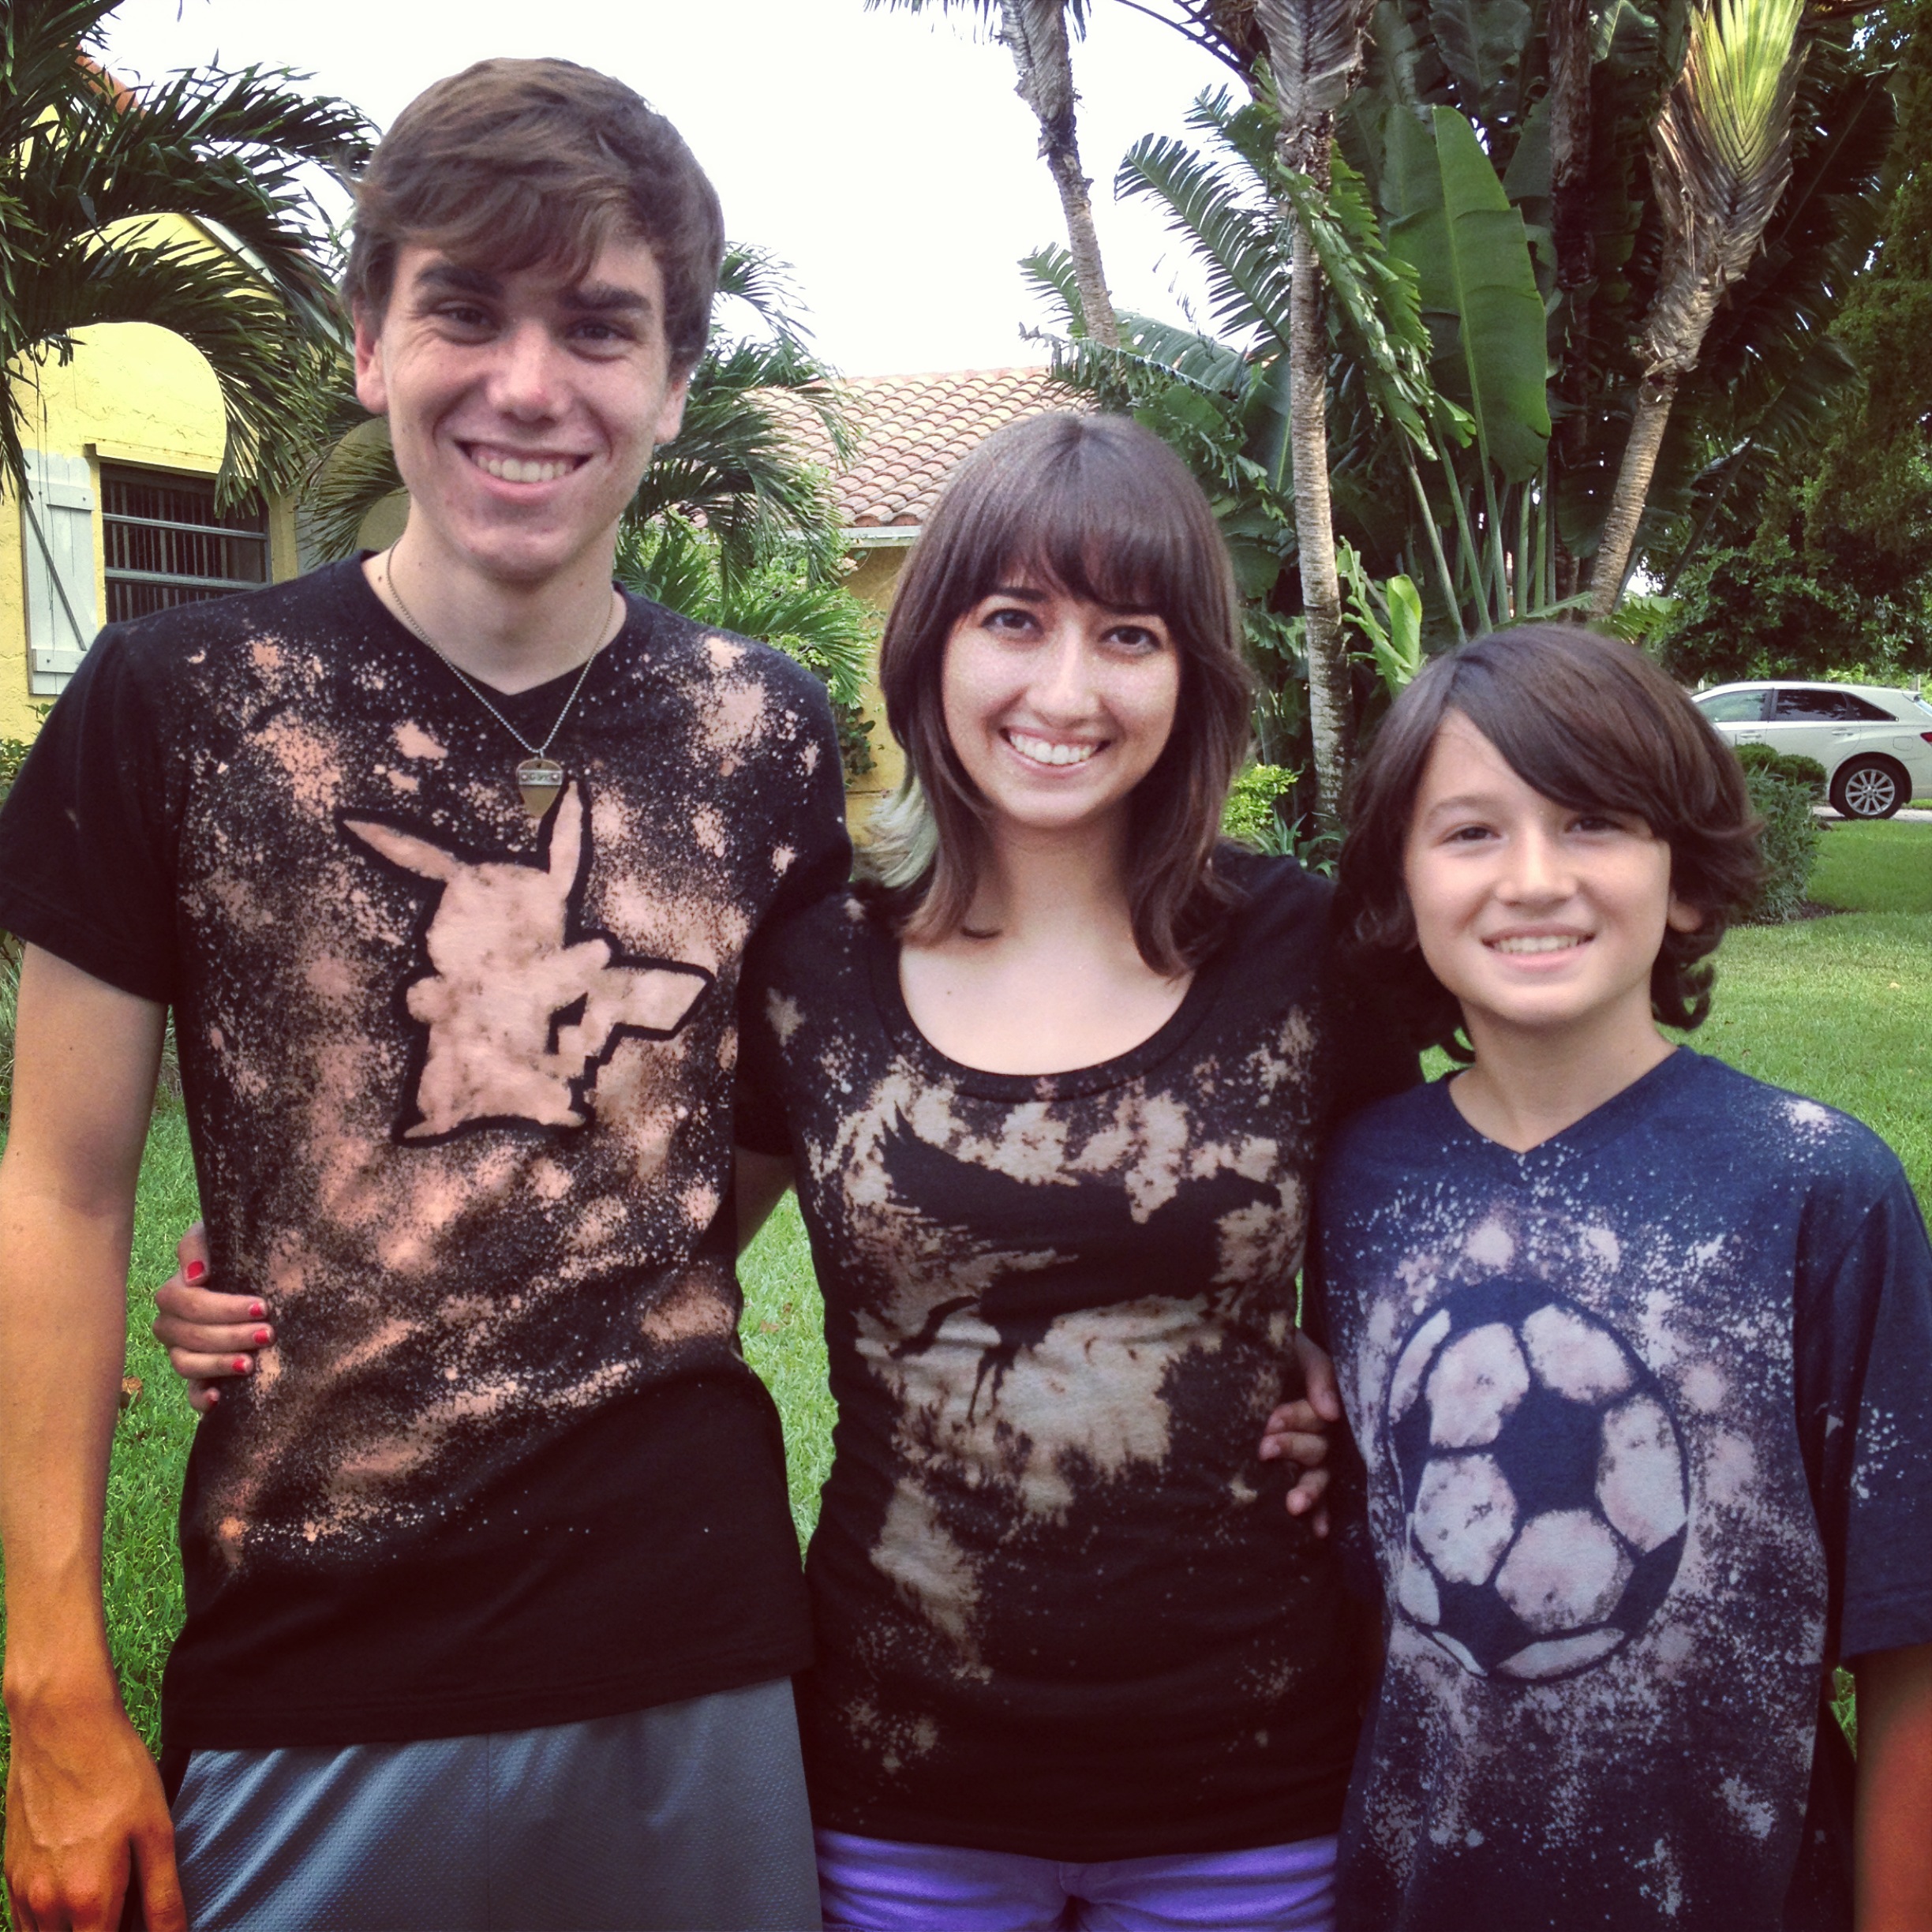
If you want more of a splatter effect you can mess with the nozzle on your spray bottle until it does what you want. You can either spray right where the design is or all over the shirt depending on what look you're going for. You can see in the photos that I applied the bleach to the stencil first, let it sit for a few minutes, removed the stencil, and then added some spray specks.
8. Let it Soak
After you've sprayed the areas, you need to let it soak, preferably in the sun if possible, for 30 min to 1 hour depending on the material and how bleached you want it to look. Keep checking on it about every 10 minutes to see its progress. Some shirts may bleach to a good point in less than 30 min.
9. Rinse with cold water and run it in the washing machine
Put your protective gloves back on if you have taken them off! Once the shirt has reached the desired bleached effect rinse it off in cold water in your kitchen sick, bathtub, or a big bucket of water. Then throw it in the washing machine, cold water setting, no soap, small load, and let it go through the cycle by itself. If you are making multiple shirts at once they can go in the washer all together.
After the wash you can throw it in the dryer or hang to dry depending on the shirt’s wash/dry instructions.
10. Finished!
Now you have a beautiful hand-bleached shirt! You are sure to get lots of compliments and you’ll be able to tell people that you made it yourself!
Send me photos if you try this yourself! I’d love to see them!


**I am in no way associated with or sponsored by any brands or companies seen in this blog post.